
If you are into professional photography or take many pictures of your family and friends, you might have been requested or feel the need to make the teeth whiter!
I know it may seem like an uncanny thing to do, but it happens a lot! So how do you whiten teeth in photos? Is that even possible?
Well, we live in the era of social media, and beauty apps are top-rated these days. From fake abs to changing eye color, you can do anything if you know the right trick!
And when it comes to photo editors, Lightroom is one of the most popular choices among the millennial. You can edit your photos with this software and take perfection to another level!
So people often ask, How to whiten teeth in Lightroom?
Don’t worry; you don’t have to be a professional to do this. You can whiten teeth in photos using Lightroom just by following some simple steps.
Do you want to learn those tricks? Keep on reading!
How to whiten teeth in Lightroom: All the tips and tricks

How to whiten teeth in Lightroom
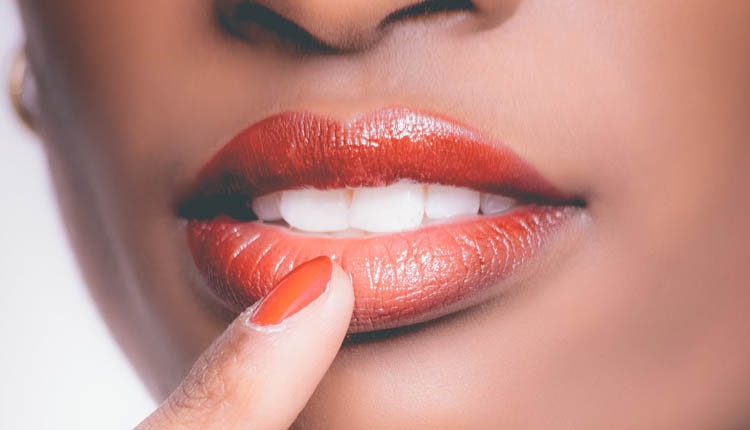
The Lightroom comes with many beautifications and editing features such as blur, smudge, changing tones, and spot removal. And one of the features is teeth whitening. It allows you to edit the subject’s teeth and give them a bright smile!
Now let’s learn the process step by step.
Step 1: Click the teeth whitening effect in Lightroom.
Go to the develop module of the Lightroom and select the teeth whitening feature. You can access this option through the brush panel of the software. It’s the first step of polishing the teeth using this editor.
Step 2: Pick your brush size.
Now it’s time for you to pick the right weapon to complete this procedure. If you are editing a large and single photo, you can go with a medium-size brush. For group photos, you can go for the smaller ones.
If you choose a smaller brush, it will take a long time to complete the entire whitening process. But if you go for the bigger one, you will be able to do it quickly. However, bigger brushes often fail to provide precise results.
Moreover, as you go on with the process, you can change your brush sizes to achieve a perfect finish.
Step 3: Do you want to use an Auto Mask?
The Auto Mask option is a feature that allows you to apply the whitening effect only to the subject’s teeth. This feature will use the edges of elements in the image as a boundary, making the whole process easier for you.
However, this feature will work correctly if your subject has a very clean teeth-edge. In case of the uneven ones, it would be best to turn off the Auto Mask option and do the editing manually.
Step 4: Paint the teeth white with the brush
Now it’s time for you to paint those teeth. Apply your brush to the places you want to be white, and your brushes will do the job. Don’t move vigorously, and try to apply the whitening effect in small strokes.
Once you apply the brush to the teeth, you will see an immediate result. And this is the final step of brightening your teeth using this software.
So, this is the ultimate procedure of how to whiten teeth in Lightroom. Let me give some more tips so you can become an expert on this!
Here are some tips to follow while editing photos in Lightroom to get more accurate results:
- Zoom in for precision
You can achieve a more accurate whitening effect; just zoom in the image to focus intensely on the teeth area. If you do so, you can paint the teeth very carefully and precisely.
To do this, go to the top left corner of the Lightroom window and select the zoom options from the navigator panel. You will see choices like the FIT, FILL, 1:1, and drop-down, etc.
Usually, people work with the FIT or 1:1 options; you can try different zoom options from the drop-down menu.
To instantly go one on the site of your editing, click on the right spot in the navigator section. If you double-click on the screen, the picture will go back to the standard size again.
- Adjust your brush properly
You always need to adjust the brush and effect according to the skin tone of the subject. If you have saved a pre-adjusted brush in Lightroom, you may feel the temptation to use the same brush for everyone. But it will not be a wise choice, to be honest.
If you want to achieve a perfectly natural look, you need to adjust the brushes according to the image’s demand. In this way, your work will get the praise it deserves.
- Keep things natural
While using Lightroom, it’s relatively easy to lose control and overdo the whitening effect. Keep on checking while painting the teeth, and don’t make it look artificial, or you will lose the essence of the photograph.
If you go a little overboard, you can always undo your actions and restart the process. It is relatively easy to apply a whitening effect on the teeth using this software, so you will not feel bored or frustrated while doing that.
Which is better, Lightroom, Classic, or CC?
The Lightroom isn’t a single program anymore; you pick either the classic one or CC. But the question is, what is the difference between these two?
Well, the Lightroom CC was designed to maintain a flawless flow in your work and save all the files in the cloud. So you can start editing the same images on a different device without any trouble. This feature allows you to edit from the place you’ve left it, so you don’t have to start from scratch.
By contrast, the Lightroom Classic is only available in the Desktop version and is mainly used by professionals. So you can’t really edit images on the go if you are working on the Lightroom Classic version.
Let’s take a quick glance at the features of these programs:
Features of the Lightroom CC
- Beginner-friendly
- Intelligent search tool
- Automatically saves photos in the cloud.
- Can be used on mobile or desktop
- Fewer import and export options
- Text only watermark options
Features of the Lightroom CC Classic
- Advanced tools for professionals
- Smart collection options
- Can’t backup original photos
- Custom watermark options
- More options for making slideshows and printing photographs
If you are just getting started with editing images, you can go for the Lightroom CC, as the classic one can be a little overwhelming for beginners.
Final Verdict:
As we are going through a social media revolution, we need to enhance our looks from time to time to stay on the radar! And when it’s about natural editing for professional or personal purpose, Lightroom is one of the best options we have!
So if you wondered how to whiten teeth with Lightroom, I think you have got the most detailed answer you can get. Now you can go out, edit some pictures and make people astounded by your photography skill!